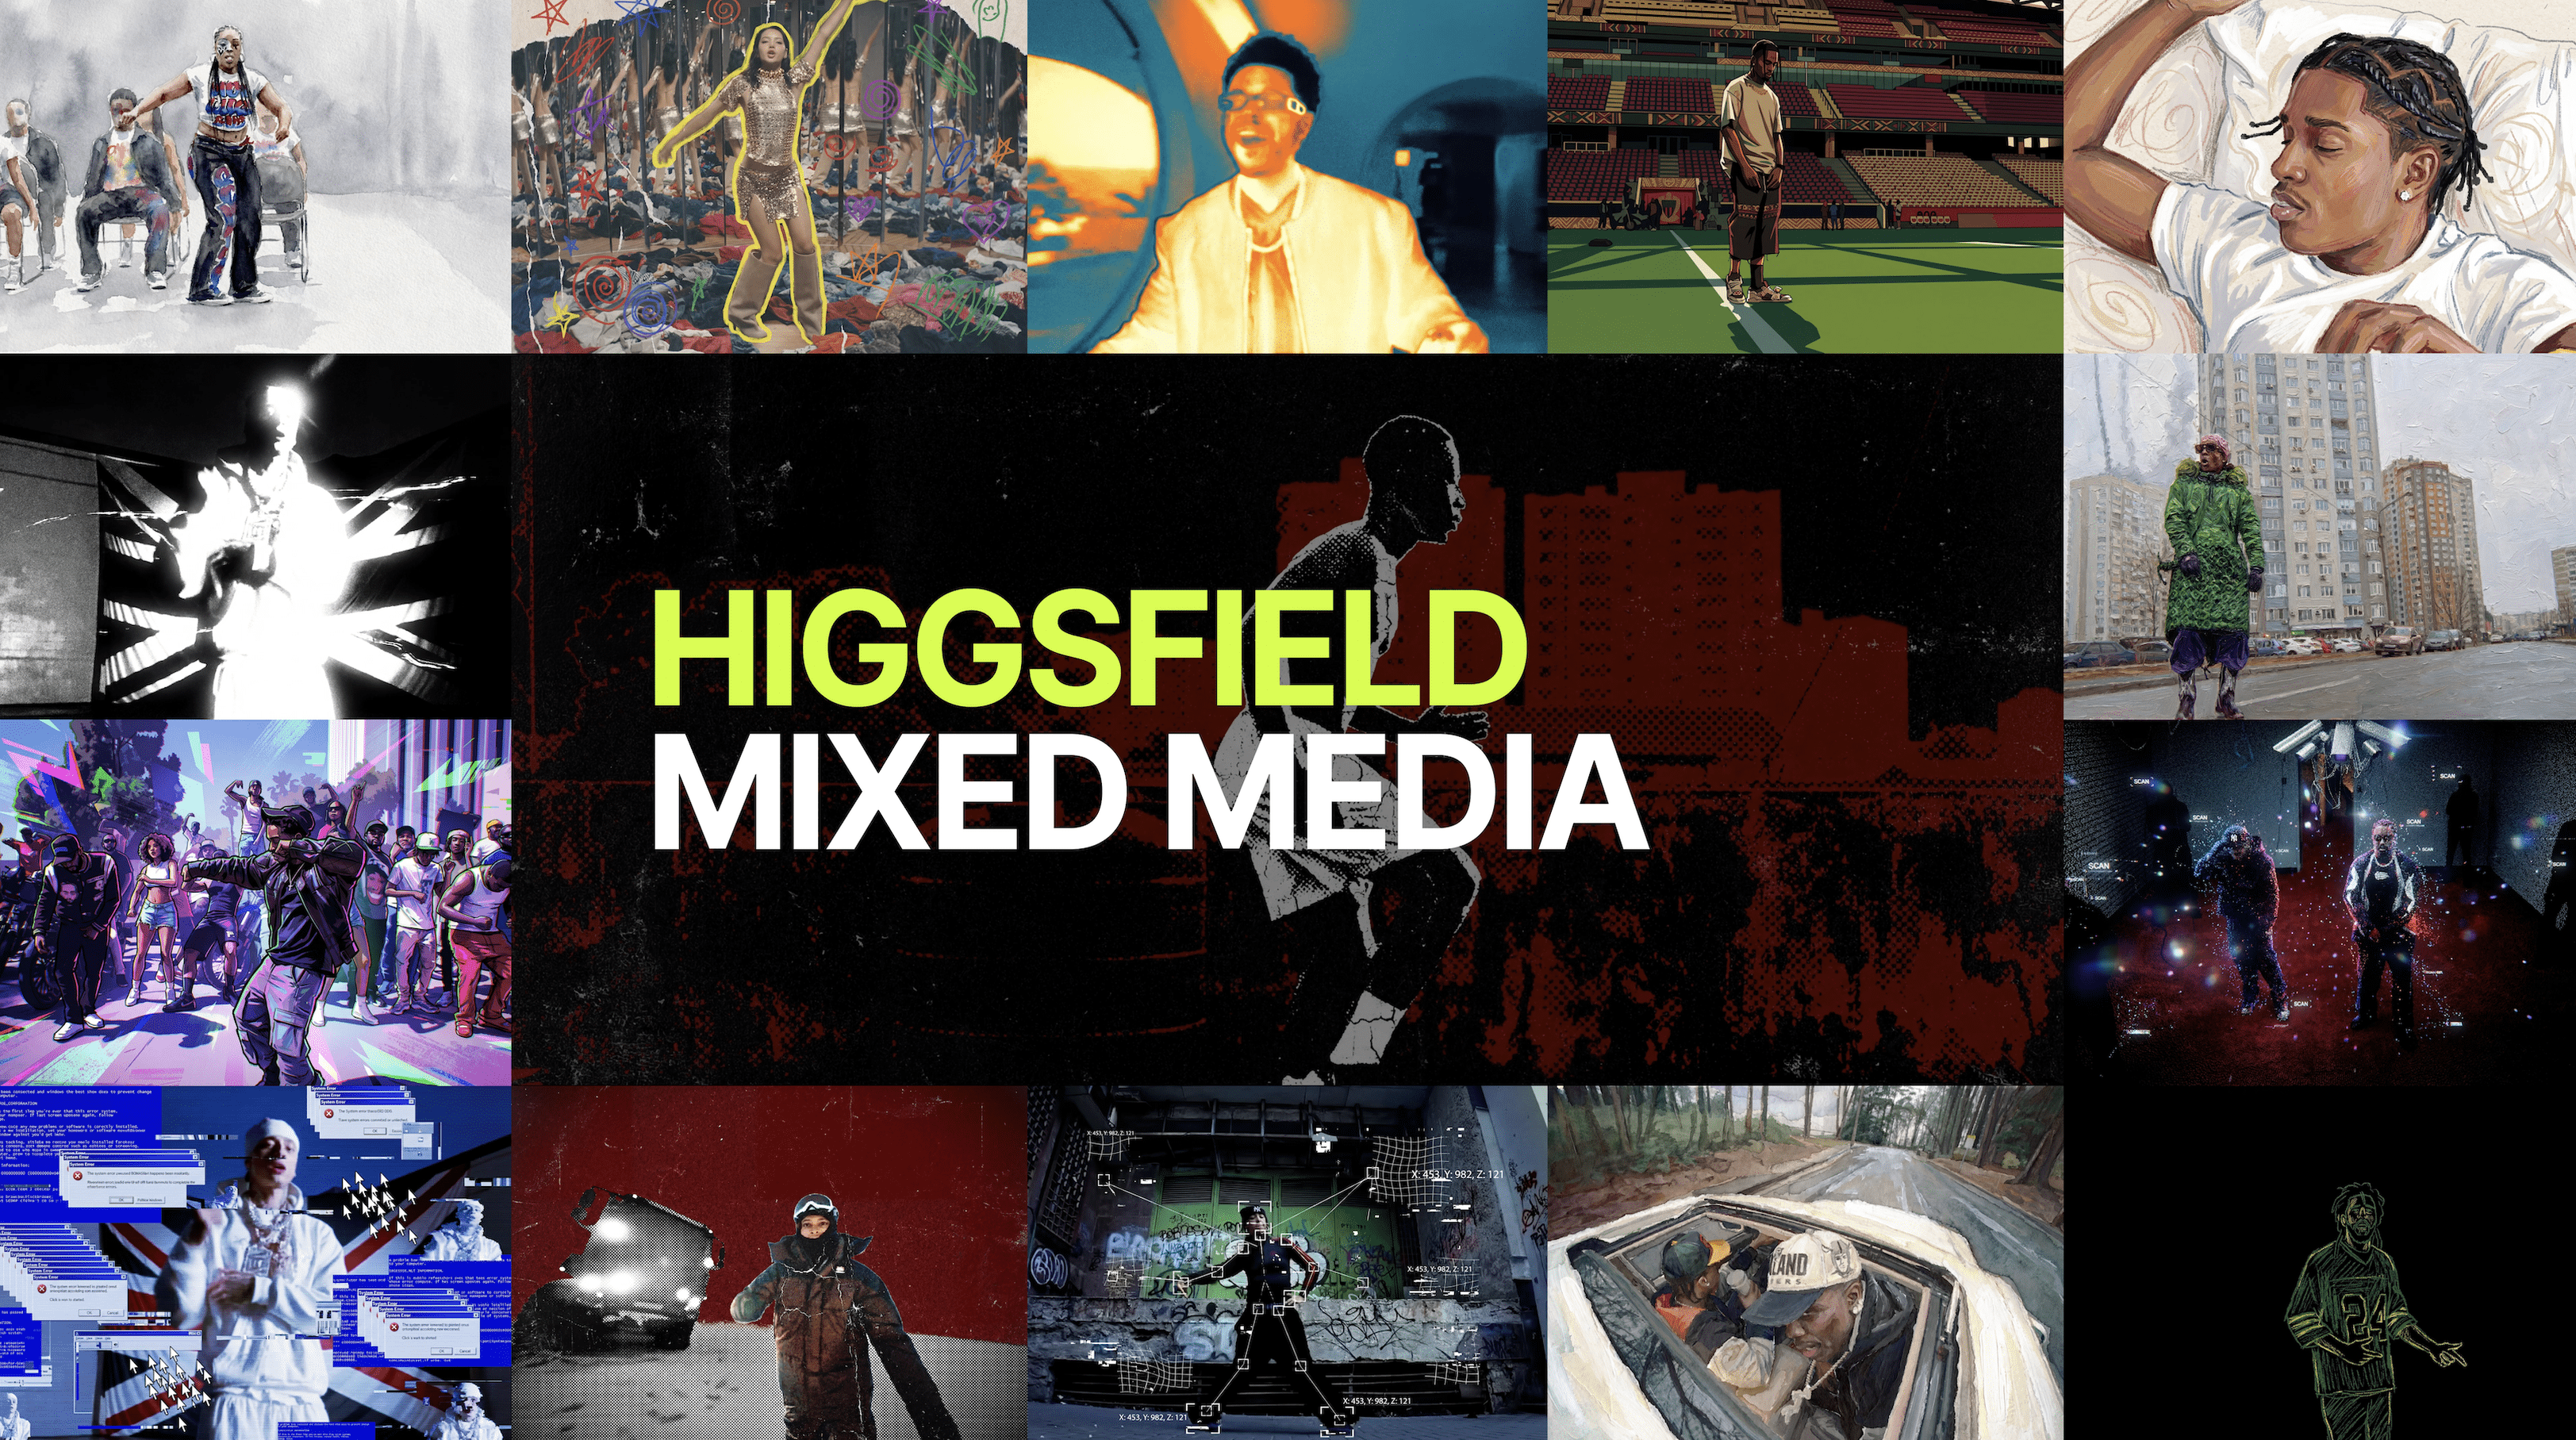
Mixed Media is a creator-first editing workflow inside Higgsfield that solves the problem of spending too much time on editing each shot. The creation of artistic, stylized AI videos has never been this professional, fun, and easy.
Video Editing Meets its First Game-Changer
If you have ever tried to turn a raw clip into something that actually feels designed, you already know the annoying part is rarely the idea, because the idea is easy, the annoying part is the time you lose jumping between editors, hunting for the right look, tweaking settings that do not translate well across formats, then exporting, re-exporting, and still ending up with a video that looks like a draft instead of a finished piece, which is exactly why HiggsfieldAI built Mixed Media as a new feature designed for speed without sacrificing creative control.
The workflow is intentionally simple, because the feature is trying to replace the repetitive part of editing where creators spend too long getting to a “first usable cut,” and it does that by combining three things that matter most for fast iteration: a strong preset library, a lightweight prompt interface, and a few high-impact controls like FPS, resolution, and color layers.
Simple Workflow with Professional Results
Mixed Media is designed for the kind of content work that happens every day, especially when speed and consistency matter more than endless micro-adjustments.
Social media repurposing, where you need one clip to match different formats, aesthetics, or series themes
Campaign variations, where you want multiple versions of the same base footage so you can test creative directions quickly
Creator branding, where you want repeatable looks that feel “signature” rather than random
Product and lifestyle content, where the footage is fine but the final look needs to feel more intentional and premium
Trend-style edits, where you want a recognizable style language without spending hours recreating it manually
If your current routine is “shoot or download a clip, then spend too long making it look like it belongs online,” this is exactly the gap and major user issue Mixed Media closes completely.
Step-by-Step Guide: Generate your First Video Edit
Step 1: Open Mixed Media inside Higgsfield
Log into Higgsfield and navigate to the feature list, then open Mixed Media.
Step 2: Choose your preset from 30+ options
A practical way to pick presets is to match them to your goal:
If you want a clean, premium look, pick presets that emphasize clarity, controlled contrast, and minimal distraction
If you want a trend edit, pick presets that push stylization and recognizable texture
If you want cinematic mood, pick presets that build depth, highlight roll-off, and film-like softness
If you want branded output, choose presets that keep forms readable so your color tweaks can work
The strongest workflow is to pick one “home preset” that becomes your series baseline, then use 2-3 alternates for occasional variation, because consistency is what makes content look professional at scale.

Step 3: Upload your 3-15 seconds video
Upload the clip you want to transform, and aim for a source video that is visually readable, because even with strong presets, the best results come from footage that has a clear subject and stable exposure.
Practical input tips for the best experience:
Use footage where the main subject is visible and not too small in frame
If the clip is very dark or heavily compressed, consider choosing a preset that embraces that texture rather than fighting it
If your clip has fast action, choosing a higher FPS output can make motion look cleaner
Step 4: Set frame rate (FPS) and resolution
Frame rate is not just a technical setting, it changes the way motion feels, which is why Mixed Media makes it a clear control.
Higher FPS generally looks smoother, especially for fast movement, panning shots, sports, dance, or handheld footage
Lower FPS can feel more cinematic or stylized depending on the preset and the content
A simple rule: if your source video is action-heavy or you plan to post on platforms where smoothness is noticeable, go higher on FPS, and if your footage is slow, moody, or meant to feel filmic, you can often stay lower, because too much smoothness can sometimes remove the mood.
Resolution is your output sharpness and platform readiness, and the right choice depends on where you are posting and how much detail you need to preserve, especially for text, product labels, or close-ups.
Step 5: Optional advanced settings
Explore the advanced layer of control for some presets:
Set Primary color: usually affects the dominant tone that the viewer reads first, which is useful for brand color alignment
Secondary color: gives you accent control, which is useful when you want highlights, clothing details, or UI-style graphic energy to lean a specific way
Background color: helps you control the environment feel, especially when you want to push mood without destroying subject readability
Choose the intsrument: marker, spray, gouache.

If you are working on marketing content, this is where you can keep the same preset but still generate variations that feel distinct, because a change in primary and secondary color can create an entirely different vibe while staying consistent in structure.
A practical way to use advanced settings is to make small changes first, because heavy shifts can sometimes overpower skin tones or product readability, so start subtle, review, then push further if needed.
Step 6: Generate your edited video
Once your video, prompt, preset, FPS, resolution, and optional color settings are set, hit Generate.
When the output is ready, review it the way an editor would:
Is the subject still readable?
Does the style support the content or distract from it?
Does the motion feel smooth enough for the platform you are targeting?
Do the colors feel intentional and consistent with the vibe?
If something is off, the fastest fix is to change only one variable: swap the preset, or adjust FPS, or slightly refine the prompt, because one-variable iteration beats random full rewrites every time.
A repeatable workflow you can run every week
If you are producing content at volume, Mixed Media works best as a simple weekly system:
Upload 3-5 raw clips from your shoot week
Apply your “home preset” to all of them first
Choose FPS based on motion intensity
Generate one alternate version using color tweaks (brand or mood shift)
Export the best outputs and schedule them
This approach gives you consistency without repetition, because your structure stays stable, while your style and mood can shift just enough to keep content fresh.
Conclusion
Mixed Media is built for creators who already have footage but need it to look finished, fast, and repeatably, because instead of spending hours inside timelines, you can upload a clip, steer the style with a prompt, choose from 30+ presets, tune FPS and resolution, optionally align colors for brand and mood, and generate a 15-second edited output that is ready to post. When you treat editing like a workflow instead of a project, you produce more, you test more, and you ship more consistently, and Mixed Media is exactly that kind of workflow tool inside HiggsfieldAI.
Get Your Viral Stylized Video in Seconds
With Mixed Media, generating an artistic video content now takes only few clicks. Upload a video, pick a preset, set FPS and resolution, optionally tweak colors, and generate your 15-second edit in minutes.